Printing on Windows
IMPORTANT NOTE FOR Printing:
ICERM uses North American Paper sizes for printing. Before sending a print job to a printer, please ensure that Letter (8.5x11) is selected. (A3 paper sizes will not work and cause the job to fail.)
Before setting up your printers, please review the overview of Printing at ICERM. The following instructions assume you are connected to the Brown University network via wireless (Brown, Brown-Guest, or eduroam)
Windows 11 instructions:
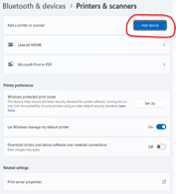
2) Click the "Add Device" button (This will cause a brief delay while your device searches for printers)
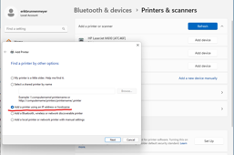
3) Click the link "Add a new device manually", when the next pane appears, click the option "Add a printer using an IP address or Hostname" and click Next
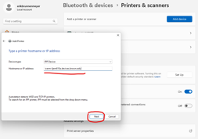
4) In the Hostname or IP address field, Enter in the following information for the 10th floor LaserJet A Printer:
icerm-ljem610a.devices.brown.edu and Press Enter, the click Finish
5) Repeat steps 2 thru 4 and also add the following printers:
10th floor LaserJet B Printer: icerm.ljem610b.devices.brown.edu
11th floor copier: icerm-im3500.devices.brown.edu
Windows 10 instructions:
Setup Instructions
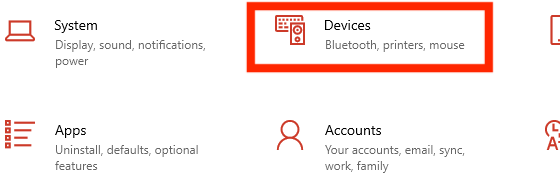
- Open Settings and choose Devices:

- Choose Printers & scanners:

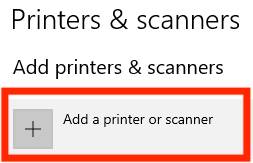
- Choose Add a printer or scanner:

- Choose The printer that I want isn't listed
- Select Add a printer using an IP address or hostname:

- On the next screen, enter:
-
- Device Type: Autodetect
- Hostname or IP address: Write in the hostname of the printer you are adding -
- 11th Floor copier: icerm-im3500.devices.brown.edu
- 10th Floor LaserJet A: icerm-ljem610a.devices.brown.edu
- 10th Floor LaserJet B: icerm-ljem610b.devices.brown.edu
-
- (For the ICERM Copier only): Choose the Microsoft PS Class Driver and click Next
- Enter a printer name and click Next. Recommended names are:
- 11th Floor copier: ICERM Copier
- 10th Floor LaserJet A: HP LaserJet M610A
- 10th Floor LaserJet B: HP LaserJet M610B
- Select Do not share this printer
- Click Next
- Click Print a test page to verify the new printer works
- Click Finish


Enabling Duplexing (Two-Sided Printing)
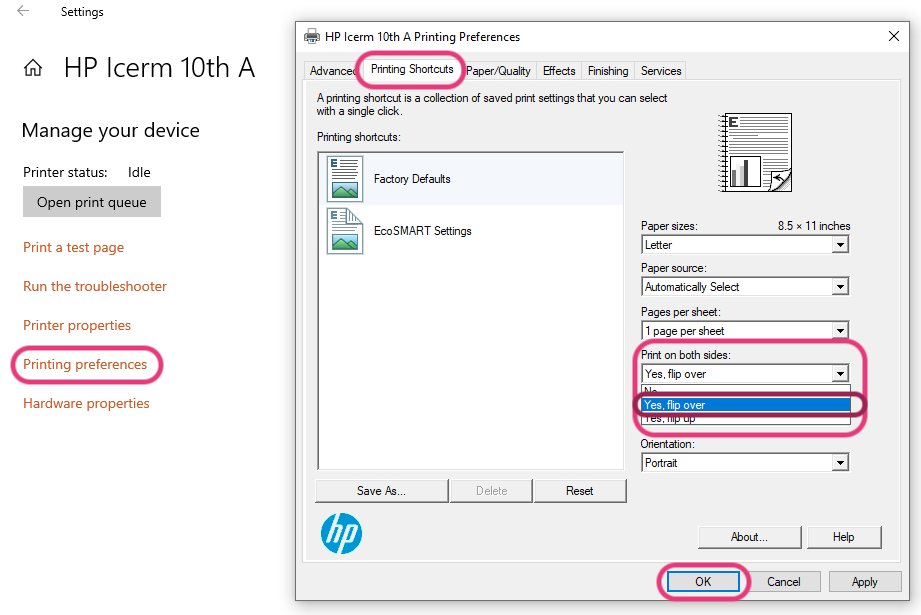
1. Click Start- > Settings -> Devices -> Printers & scanners -> Click the printer you just added -> Manage

2. Click Printing preferences, and within Printing Shortcuts find Print on both sides, click Yes, flip over. Then hit OK.
You did it!! 🥳
If you have questions about these instructions or require further assistance, please contact the ICERM IT staff by dropping by the administrative offices or emailing support@icerm.brown.edu.