Printing on Windows
IMPORTANT NOTE FOR Printing:
ICERM uses North American Paper sizes for printing. Before sending a print job to a printer, please ensure that Letter (8.5x11) is selected. (A3 paper sizes will not work and cause the job to fail.)
Windows 11 instructions:
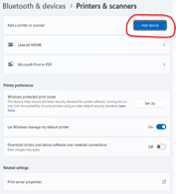
2) Click the "Add Device" button (This will cause a brief delay while your device searches for printers)
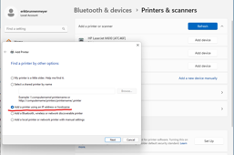
3) Click the link "Add a new device manually", when the next pane appears, click the option "Add a printer using an IP address or Hostname" and click Next
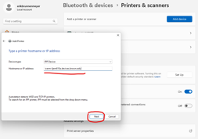
4) In the Hostname or IP address field, Enter in the following information:
icerm-ljem610a.devices.brown.edu and Press Enter, the click Finish
5) Repeat steps 2 thru 4 and also add the following printers:
icerm.ljem610b.devices.brown.edu
icerm-im3500.devices.brown.edu
Windows 10 instructions:
Before setting up your printers, please review the overview of Printing at ICERM.
The following instructions assume you are connected to the Brown University network via wireless (Brown, Brown-Guest, or eduroam).
Setup Instructions
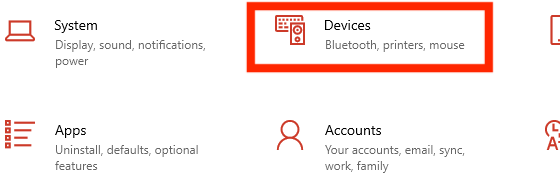
- Open Settings and choose Devices:

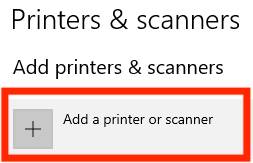
- Choose Printers & scanners:

- Choose Add a printer or scanner:

- Choose The printer that I want isn't listed
- Select Add a printer using an IP address or hostname:

- On the next screen, enter:
-
- Device Type: Autodetect
- Hostname or IP address: Write in the hostname of the printer you are adding -
- 11th Floor copier: icerm-im3500.devices.brown.edu
- 10th Floor LaserJet A: icerm-ljem610a.devices.brown.edu
- 10th Floor LaserJet B: icerm-ljem610b.devices.brown.edu
-
- (For the ICERM Copier only): Choose the Microsoft PS Class Driver and click Next
- Enter a printer name and click Next. Recommended names are:
- 11th Floor copier: ICERM Copier
- 10th Floor LaserJet A: HP LaserJet M610A
- 10th Floor LaserJet B: HP LaserJet M610B
- Select Do not share this printer
- Click Next
- Click Print a test page to verify the new printer works
- Click Finish


Enabling Duplexing (Two-Sided Printing)
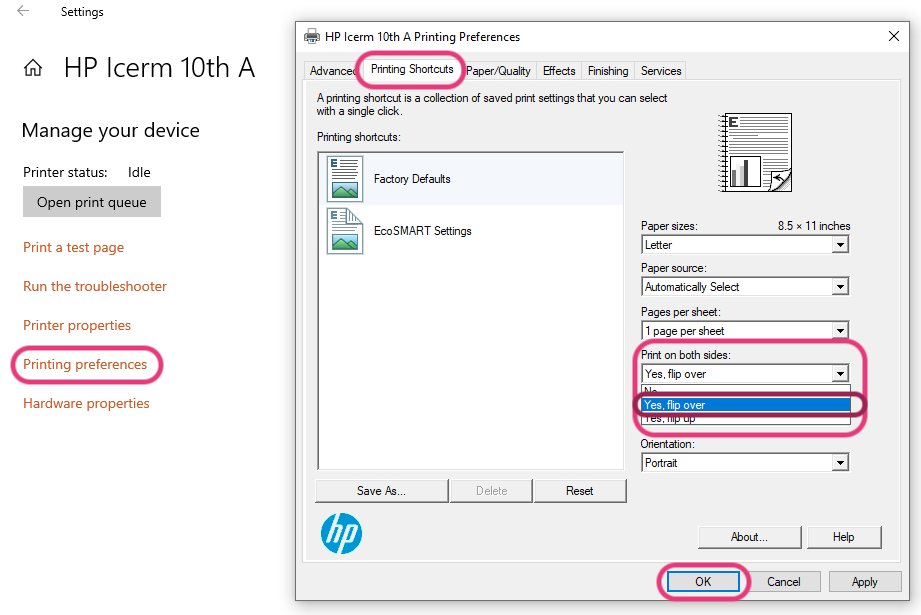
1. Click Start- > Settings -> Devices -> Printers & scanners -> Click the printer you just added -> Manage

2. Click Printing preferences, and within Printing Shortcuts find Print on both sides, click Yes, flip over. Then hit OK.
You did it!! 🥳
If you have questions about these instructions or require further assistance, please contact the ICERM IT staff by dropping by the administrative offices or emailing support@icerm.brown.edu.