Printing on macOS
Before setting up your printers, please review the overview of Printing at ICERM.
The following instructions assume you are connected to the Brown University network via wireless (Brown, Brown-Guest, or eduroam).
Setup Instructions
These photos are for OSmacOS MontereyVentura and beforenewer. If your computer isruns currentlyan runningolder Ventura,version of macOS, System PreferencesSettings will look a bit different. For steps 1 & 2, Look for "Printers & Scanners" in the left menu bar of System Preferences.Preferences, Thenthen click "Add Printer, Scanner, of Fax..." Steps 3 - 6 will be the same.
1. Open System preferencesSettings ( Menu > System Preferences)Settings) and click on the “Printers & Scanners” tab.
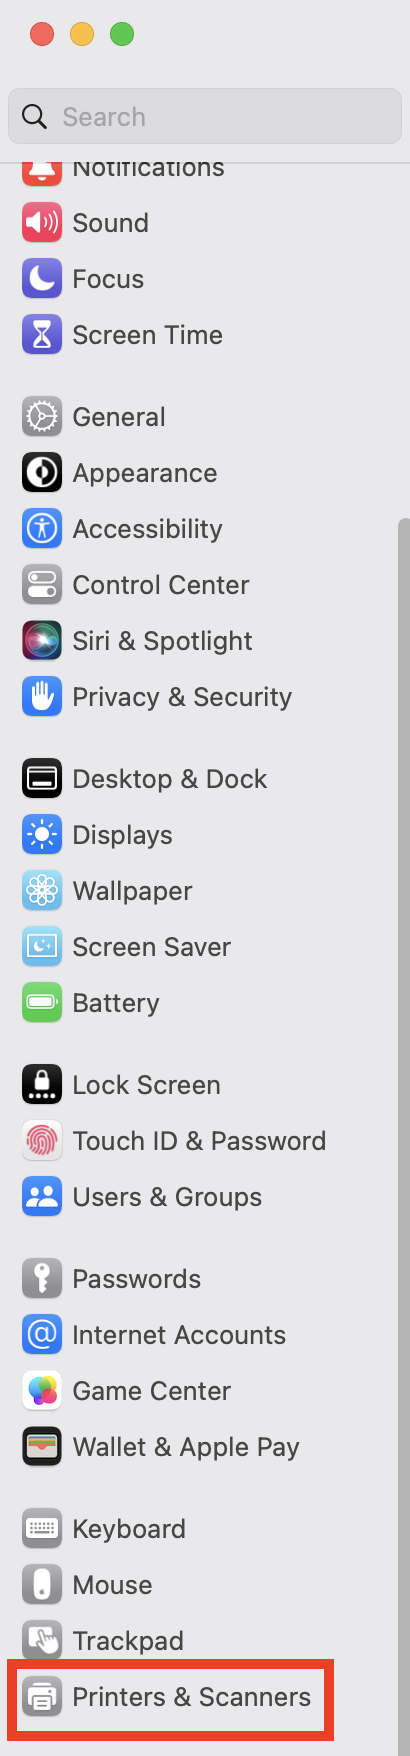
2. Below the list of printers on the left, click the [+] button and select “Add aPrinter, printerScanner, or scanner”Fax... button to add a printer.

3. In the add printer dialog that opens, click the “IP” tab and enter the printer’s hostname for the printer you wish to add, and select Line Printer Daemon – LPD in the protocol dropdown.
-
11th Floor Copier: icerm-im3500.devices.brown.edu
-
10th Floor LaserJet A: icerm-ljem610a.devices.brown.edu
-
10th Floor LaserJet B: icerm-ljem610b.devices.brown.edu

4. The system should then detect the printer and automatically fill the Name and Use fields at the bottom of the add printer window. If it does not, name the printer, select “Generic PostScript Printer”Printer in the Use dropdown, then click Add.Add.
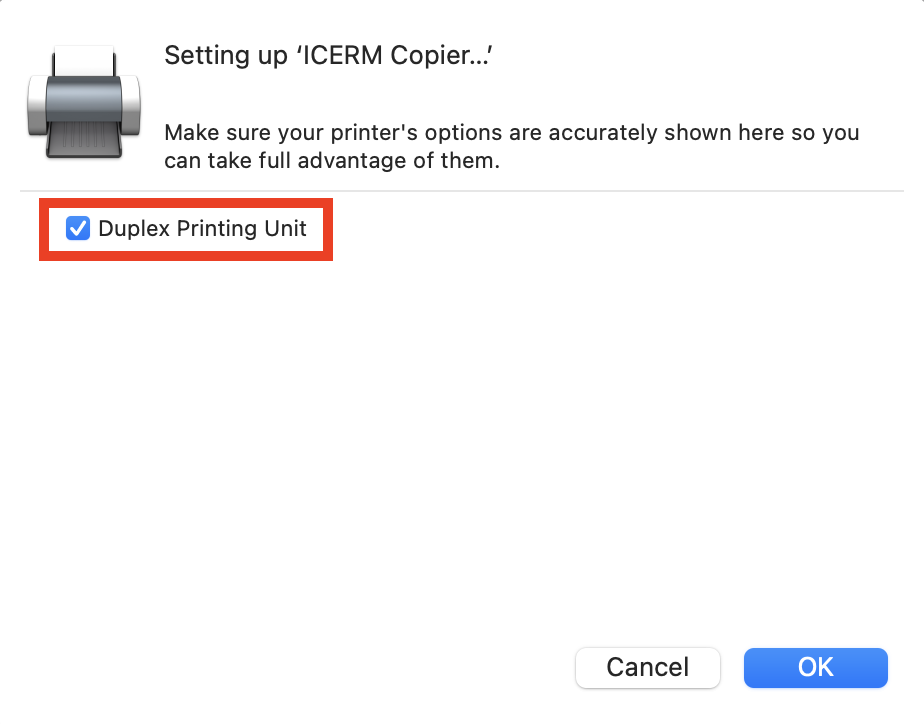
5. A settings options window may appear. Select “duplex printing” and save.
6. The printer should be configured and ready to use. Print a test page to verify.
If you have questions about these instructions or require further assistance, please contact the ICERM IT staff by dropping by the administrative offices or emailing support@icerm.brown.edu.